Transforming an Old Secretary Desk: A Stunning Refinishing Journey with Before and After Pics
- Danielle Wilson
- May 28
- 4 min read

Refinishing an old secretary desk can breathe new life into a piece that might otherwise be forgotten or discarded. This project not only restores the desk’s beauty but also preserves its history and character. In this post, I will share the detailed process of refinishing an old secretary desk, including the challenges faced, the techniques used, and the final results. Along the way, you’ll find practical tips and insights that can help you tackle a similar project with confidence.

Assessing the Desk and Planning the Project
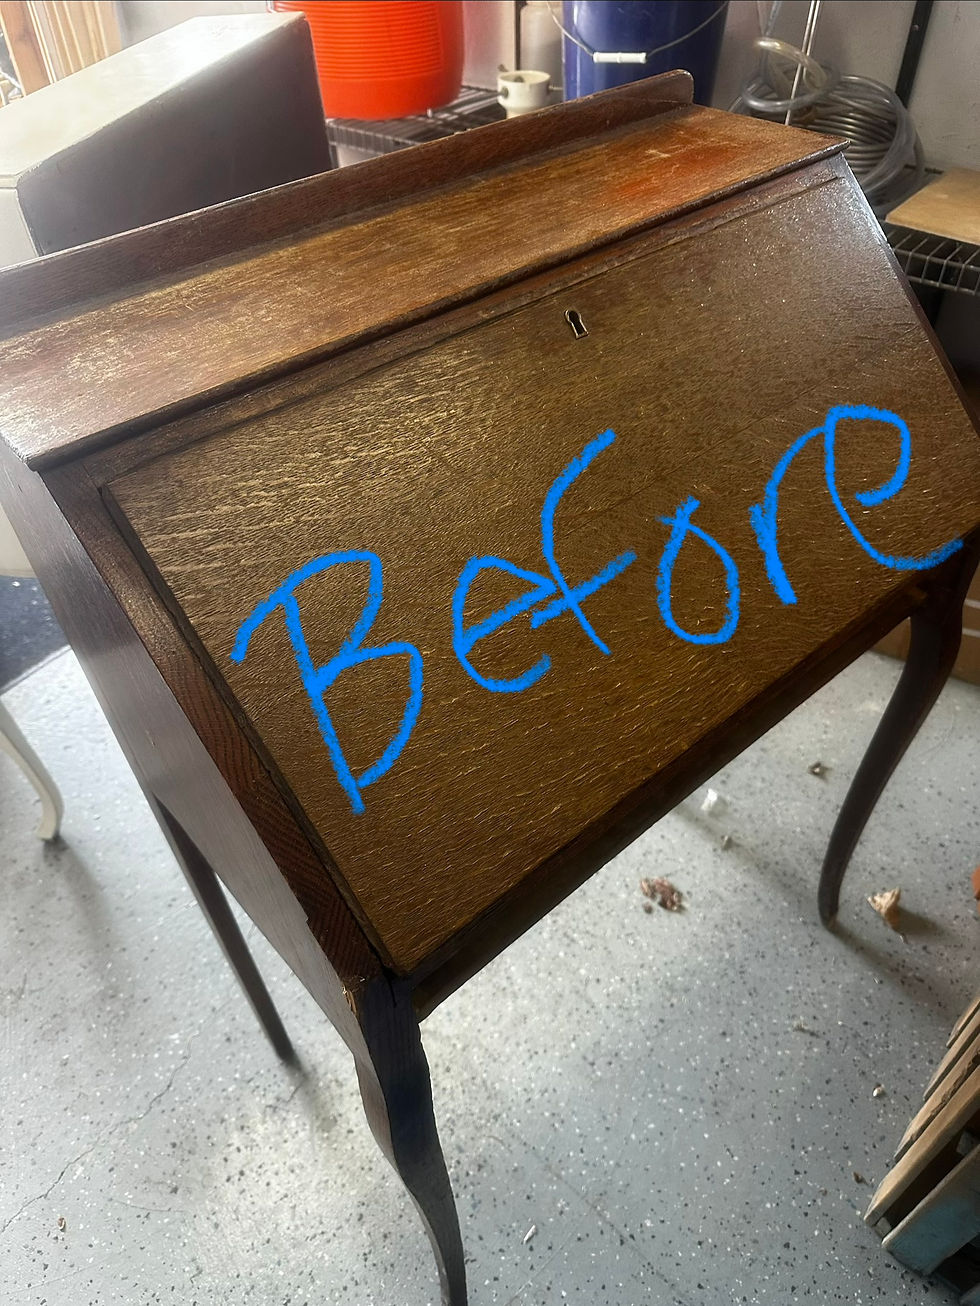
Before starting any refinishing work, it’s crucial to carefully examine the desk. This old secretary desk had several issues:
Worn finish: The original varnish was scratched and faded.
Surface damage: There were small dents and water stains on the desktop.
Hardware wear: The drawer pulls were tarnished and some were loose.
Structural integrity: The desk was sturdy but needed tightening of joints.
Understanding these problems helped me decide on the best approach. I planned to strip the old finish, repair the surface damage, sand the wood smooth, apply a new stain, and finish with a protective coat. I also planned to clean and polish the hardware rather than replace it, to keep the desk’s vintage charm.
Stripping and Preparing the Surface
The first step was removing the old finish. I used a chemical stripper designed for wood furniture, applying it carefully with a brush. After letting it sit for the recommended time, I scraped off the softened finish with a plastic scraper to avoid damaging the wood.
Once most of the finish was removed, I cleaned the surface with mineral spirits to remove residue. This step is important because leftover stripper can interfere with staining.
Next, I inspected the wood for any remaining finish or rough spots. I sanded the entire desk using medium-grit sandpaper (120 grit) to smooth out imperfections and remove any lingering finish. Then, I followed with fine-grit sandpaper (220 grit) to prepare the wood for staining.
Repairing Surface Damage
The desk had several dents and water stains that needed attention. For dents, I used a simple steam method:
Dampen a clean cloth and place it over the dent.
Apply a hot iron on top of the cloth for a few seconds.
The steam helps the compressed wood fibers swell back to their original shape.
This method worked well for shallow dents. For deeper damage, I used wood filler that matched the desk’s wood color. After applying the filler, I sanded the area smooth once it dried.
Water stains were treated by lightly sanding the affected areas and then applying a wood bleach solution. This helped reduce the discoloration without damaging the wood.
Choosing the Right Stain and Finish
Selecting the stain color was a key decision. I wanted to enhance the natural grain of the wood while giving the desk a warm, inviting look. After testing several stain samples on a hidden part of the desk, I chose a medium walnut stain. This color complemented the desk’s vintage style and brightened the overall appearance.
For the finish, I opted for a satin polyurethane. This finish offers good protection against scratches and spills while maintaining a soft sheen that doesn’t look overly glossy.
Applying Stain and Finish
Applying the stain required patience and care. I used a clean cloth to apply the stain evenly, working in the direction of the wood grain. After letting it sit for about 5 minutes, I wiped off the excess with a dry cloth. This step ensures the stain doesn’t become blotchy or too dark.
Once the stain dried completely (about 24 hours), I applied the first coat of polyurethane with a high-quality brush. After the first coat dried, I lightly sanded the surface with fine sandpaper (320 grit) to remove any brush marks or dust particles. Then, I applied a second coat for added durability.
Restoring the Hardware
The original drawer pulls and hinges added character to the desk, so I decided to restore them rather than replace. I soaked the hardware in a vinegar and water solution to remove tarnish. After drying, I polished them with a metal polish to bring back their shine.
Loose screws were tightened, and any missing screws were replaced with similar vintage-style ones to maintain authenticity.
Final Assembly and Touches
After the finish cured for several days, I reassembled the desk. I checked all drawers and compartments to ensure smooth operation. Finally, I added felt pads to the bottom of the desk legs to protect floors and make moving easier.
The Transformation Revealed
The refinishing process transformed the old secretary desk into a stunning piece that looks both timeless and fresh. The wood grain shines through the walnut stain, and the satin finish adds a soft glow. The repaired dents and stains are no longer visible, and the polished hardware completes the look.
This project shows how refinishing can restore beauty and function to a piece of furniture that might otherwise be overlooked.


Comments